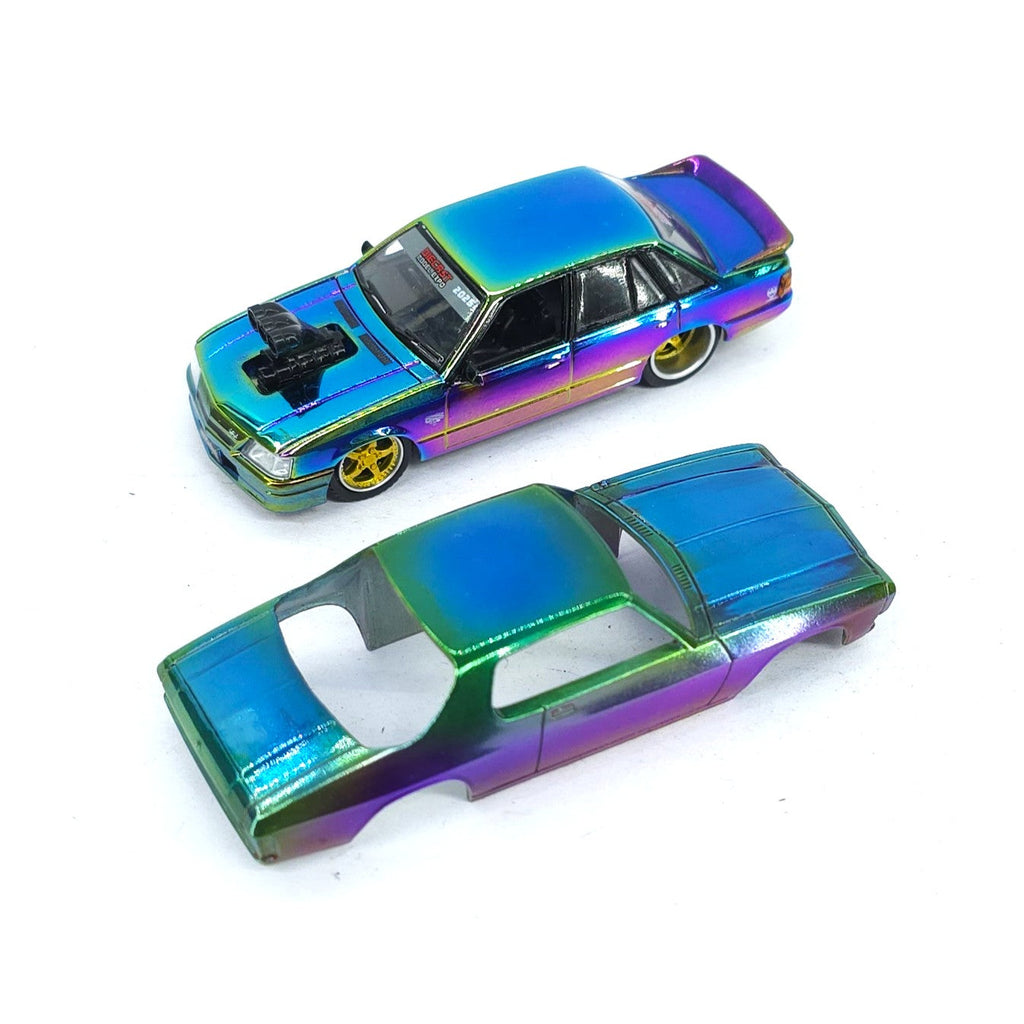
TUTORIAL : Create a Multi-Coloured Anodised Effect

At the recent Diecast Model Expo, our friends from Oz Wheels released a Limited Edition 1/64 VK Commodore diecast car with a unique multi-coloured anodised finish. The car looks beautiful in it's finish, with deep vibrant candy coloured effects that have been created at the factory using a special anodising method to colour the metal itself.
When speaking with Jesse from Oz Wheels, we put out a challenge to myself to see if it would be possible to recreate the finish with SMS Paints - a challenge that I took up to once again prove the power of SMS Paints to create unique paint finishes.
So, after returning from the Diecast Expo, I did some quick experiments and worked out a clear plan of attack to replicate the anodised finish as best I could by using some of our Clear Colours.
Here's an Oz Wheels HQ Monaro that I painted against the real anodised Oz Wheels VK Commodore - it came up a very close match - so let's now break down the step by step of how I replicated this effect using SMS Paints.

STEP ONE : Clean up and prepare the model for painting. To get this effect, you must have a very high shine, mirror finish on the base. You can do this in two ways, first is to use SMS HyperChrome (the only way if you are doing this effect on a plastic model), or the other way if you are doing this on diecast, is to polish the metal until it is a mirror finish.
For this tutorial, I am demonstrating on one of the 1/64 Oz Wheels diecast HJ Panel Vans, so I have polished this body up using fine grade steel wool first and finished it off using some Cut & Polish with a soft rag. 
STEP TWO : Using Clear Yellow, highlight around all the edges of the body, making sure to come outwards a little bit in a random pattern. 
STEP THREE : On the lower sides of the model, colour in the space with Clear Pink. Clear Pink is needed for a base colour for a later step in this process. 
STEP FOUR : Now using Clear Green, lightly go over the Clear Yellow around the upper parts of the model. Going on lightly gives you control on how the final colour looks, in this case we just want to get a yellow green tone rather than go full dark green. 
STEP FIVE : With Clear Aqua, fill in the open spots on the sides, bonnet and roof. 
STEP SIX : Taking Clear Blue, really lightly apply it in the center of the roof and bonnet, You don't want to overpower the Clear Aqua, you just want to adjust the tone in the center. Repeat this as well over the Clear Pink to change the pink to a purple.

STEP SEVEN : And to finish it off, apply a top coat of Super Clear to really bring out the shine.

Or if you wanted a totally different effect, why not try applying a coat of Flat Clear over the top to remove the mirror look to create an even more unique effect! 
Watch these two YouTube Shorts below to see this technique in action :
And that's it!
To create this effect, it's all about the base being that high shine mirror and then control of the airbrush as you lay down the Clear Colours, and remember that you can create transitions between colours and new shades by layering the Clear Colours on top of each other. You can come up with some pretty crazy colour combinations using this method, so experiment and have some fun on your next project!
Keep on modelling!
- Scott

