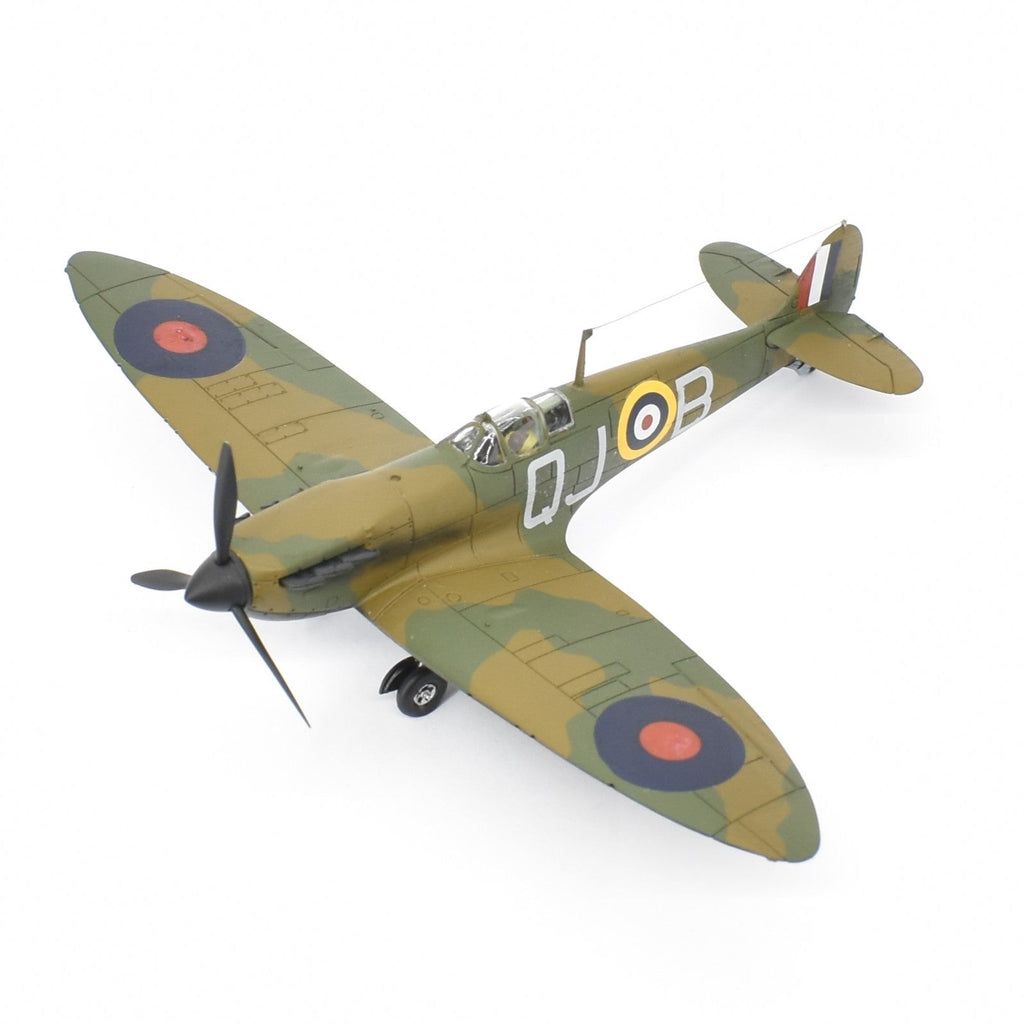
Building the Airfix 1/72 Spitfire Mk.1a with SMS Paints

Let me start with a confession — I haven’t really built that many aircraft models. Over the years, I’ve tackled all sorts of modelling subjects, but aircraft have always been a bit of a blind spot. I’ve had a few kits pass across my bench, but none ever made it past basic assembly.
That’s why I decided it was finally time to change that. What better way to dip my toes in than with a true classic — the Airfix 1/72 Spitfire Mk.1a. It’s one of those kits most modellers have built at some point, so it felt like a good place to begin.
Cockpit and Interior Work
The build kicked off with the cockpit, which thankfully went together like a dream. Everything lined up perfectly, and with a little SMS Extra Thin Cement, I had it all glued in place and ready for paint.
For the interior, I airbrushed on PL100 British Interior Green, making sure to coat both the cockpit and the inner fuselage halves. After letting it dry for about 30 minutes, I came back and hand-painted the smaller details using PL01 Black, PL13 Dark Brown, and PMT01 Silver. To finish it off, I added some DIY seatbelts made from masking tape — a quick and easy touch that really adds depth.

Once everything was dry, I gave it a wash with PLW04 Dark Brown Wash to give it a bit of grime and realism.

Sealing It Up and Tackling the Seams
With the cockpit set, I closed the fuselage using more SMS Extra Thin Cement. Again, everything aligned beautifully. I taped the fuselage up tightly and let it sit while the glue cured.
Now came the seam lines. Normally I’d reach for modelling putty, but this time I tried an old trick — dissolving sprue chunks in Extra Thin Cement to make a homemade plastic filler. It worked well, but it does stay soft longer, so I gave it a full day before sanding it back. If you sand too soon, it can tear and make more of a mess than you started with.
Prepping for Paint

With the airframe assembled, I added the canopy, masked it off, and got ready to paint. First up was a smooth base coat of PLP01 Surfacer Grey Primer. This step not only evened out the surface but also highlighted a small imperfection in one of the seams. Instead of more putty, I simply layered on a bit more Surfacer Grey with the airbrush — a lazy but effective fix that blended perfectly.
Classic RAF Camouflage with SMS Paints
For this early Mk.1a, I went with the classic Dark Earth/Dark Green camo in a faded version on top and the 50/50 Black and White underside.
Topside: I started with a full coat of PL85 Dark Earth. Once dry, I created masks using a printed line-art template scaled to match the kit.

I stuck the pattern onto SMS Masking Tape, cut out the camo shapes, and applied them.

Then I airbrushed on PL77 Forest Green, which is a great match for a faded RAF Dark Green. Peeling off the tape revealed a nice, sharp camo pattern.


Underside: The entire bottom was sprayed PL01 Black. After drying for 15 minutes, I masked a line down the fuselage center and airbrushed PL02 White on the other side. Pulling off the tape revealed a crisp, clean divide — exactly what I was hoping for.

Decals, Washes, and Final Touches
Decals were next. I used the kit-supplied ones, but of course, two of the roundels split during application (why is it always the roundels?). After a bit of swearing and careful nudging, I managed to line them up well enough for decal softener to do its thing.
For weathering, I went back to the PLW04 Dark Brown Wash to bring out the panel lines and subtle surface detail. It gave just the right amount of contrast without overdoing it.
Final details like the wheels were hand-painted with PMT01 Silver and PL01 Black. I also added the guidewire using a fine strand of nylon fibre — glued at the canopy, stretched tight, and secured to the tail.
And with that final touch, the Spitfire Mk.1a was complete!


Final Thoughts
As someone who’s never really ventured too deep into aircraft modelling, I’ve got to say — this kit, paired with the reliability of SMS Paints, made the experience quite enjoyable.
So, if you are looking to try your hand at aircraft for the first time, this classic Spitfire kit and a bench full of SMS gear might just be the perfect place to start.
Keep on modelling!
- Scott

